Detailing World Forum banner
21 - 36 of 36 Posts
Discussion starter · #21 ·
We got the doors fitted once the roof was on and the gable ends were finished by the brickies . After some deliberation and discussions with local suppliers, the builders and wandering round looking at neighbours garage doors like a weirdo I decided upon an insulated Hormann Rollmatic with electric operation. I've been really impressed by the door although the installation isnt quite finished (waiting for the roughcasters to do their bit). We went for a standard PVC rear door, and I didn't want any windows. In between times the builder cracked on with insulating the ceiling, and sheeting it in, along with fitting the strip lights. These will be a temporary arrangement whilst I get the inside sorted how I want it, as I had them originally bought for the garage. I'll hopefully replace these with an LED fitting of some sort.
Image

Image

Image

Image

Image

Image
 
Discussion starter · #24 ·
Been a while since the last update but theres been lots of progress. Once the ceiling was finished and wired up, I wanted to split the lighting circuit in two, which I wished I had done in the first place but the builder had pressed on and done for me during the ceiling install. This meant making some holes in the ceiling but was worthwhile. Next, I pressed on with running in the electrics for all the sockets and externally lighting that I wanted which needed done before the walls were sheeted.
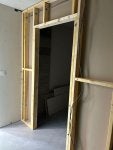
I had always intended on making a partition wall, with sliding door to create a small workshop area at the back, hence the number of sockets, and I also hate trailing cables. A pet hate of the previous garages I have had was having to run extension cables so I've probably gone OTT with the sockets but better looking at them than for them.
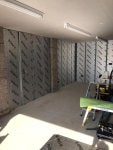
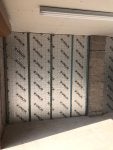
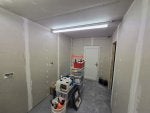
The walls were insulated and sheeted next, along with installation of the partition, with how I visioned the garage now starting to feel a lot more real.
 

Attachments

Discussion starter · #26 ·
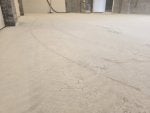
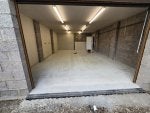
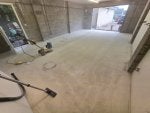
Next was the flooring. I deliberated for a long while about the flooring. Reading numerous posts, and watching numerous videos on the pros and cons of paint Vs epoxy Vs tiles. I got a few quotes for tiles, epoxy coatings and even visited a local truck yard who the builder had proposed where they use Coovar floor paint which was what they used. In the end I decided against a self applied epoxy pain for the floor. Then the rabbit hole of how to prepare the already very good concrete floor to take the paint. I toiled for days with PVA sealing the floor, or grinding the top layer of dusty concrete which is what I went with. This took a couple of hours with a hired grinder, and ended in months of discomfort. I failed to recognise how much of an irritant concrete dust can be and, having done the job in September, I'm still suffering the consequences on my skin and scalp. Lesson learned here for sure!
 

Attachments

Discussion starter · #27 ·
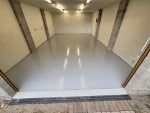
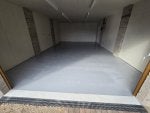
After recommendation from a couple of friends, I opted for Floorsavers Epoxy floor paint Epoxy Garage Floor Paint - 5L
For anyone else wondering, it really was as simple as mix it and roll it on. You do have a time limit but even in my garage, with 40m2 floor to paint, it only took an hour or so to roll on. The paint rolls on dead easy and spread pretty decent, I used the supplied roller kit with the 12" roller, but could easily have been done in similar timeframe with a standard 9".
 

Attachments

Discussion starter · #28 ·
Next came the internal partition wall, which the builder fitted, along with the required opening for the planned sliding door. Once fitted came the laborious process of taping and filling which I took a crash course in courtesy of the builder. I'd never attempted plastering before, but with good tunes you soon get into a rhythm with it.
 

Attachments

Discussion starter · #29 ·
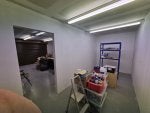
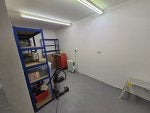
3 coats to each joint around the workshop area before sanding and painting. I defaulted to white for the workshop, and after the three coats I was pleased with the finish. There were some wee bits around the ceiling where I could have done better but needed reminding that it is just a workshop area. Main area of the garage has had its first couple fill by this point as I focused on getting the garage ready for storage, and in doing so, emptying the shed, summer house and our wee storage hut. I've reused the bigdug storage units for this, although some of the shelves are worse for wear being stored in the shed along with 9 months of moisture. I'll likely replace these but they will do for now.
 

Attachments

Discussion starter · #30 ·
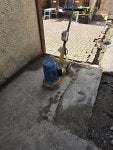
We waited what felt like an eternity to get the rough casters too, between their availability and a decent weather window in the autumn, the inevitable rain and wind causing some chaos. The guys were highly recommended and were well worth the wait, completing a brilliant job over two visits and crucially a few weeks before the frosts arrived, allowing the exposed layers to be well on to being fully cured. In between visits the builders had to dig a good portion of the drive up to install the drains and the channel required to tie in the downpipes off the gutters. This involved the painful task of lifting the existing drain cover to get access to the drain pipes for the house.
Image

Image

Image

Image

Image

Image

Image

Image

Image

Image
 
Discussion starter · #35 ·
Really makes me want to do something with mine, but just not got the £20k that it would take.
I've been in that position since we moved in 11 years ago, and it is a big outlay for what essentially is storage space in most peoples eyes. For me though, a garage is more than that, its a space to detail, mend, paint and potter about and be happy doing something different away from work, family or in my case recently sutdying. An escape of sorts.
Would your stables be easily modified to alter? I looked at various options down the years, patching, re-roughcasting, prices for new roof etc. The next time I move it will be me in the box and so I eventually convinced the Mrs that this was the best long term option, and although expensive now, would be cheaper than if the old one fell down in years to come and be maintenance free for a couple of decades hopefully.
 
Image
Image


This is my layout mate, red is the boundry, green where my car is parked on the picture, blue is the 13m x 5m stables, yellow is a garden building that I've solidly build by hand so it's not going anywhere.,

Only real option might be to knock it down and then put it on the left, but then a bit of a awkward path around it all to get to the garden further down past the garden building.
Image


2 closed stables 1 open stable and then 1 closed narrow garden shed type size, so typically all full of wood, tools and other stuff accumulated over the years. No idea where any of it would go if I did have to demolish them.
Roof is fine, just some cracks starting to get bigger so the rebars are rusting inside.
 
21 - 36 of 36 Posts